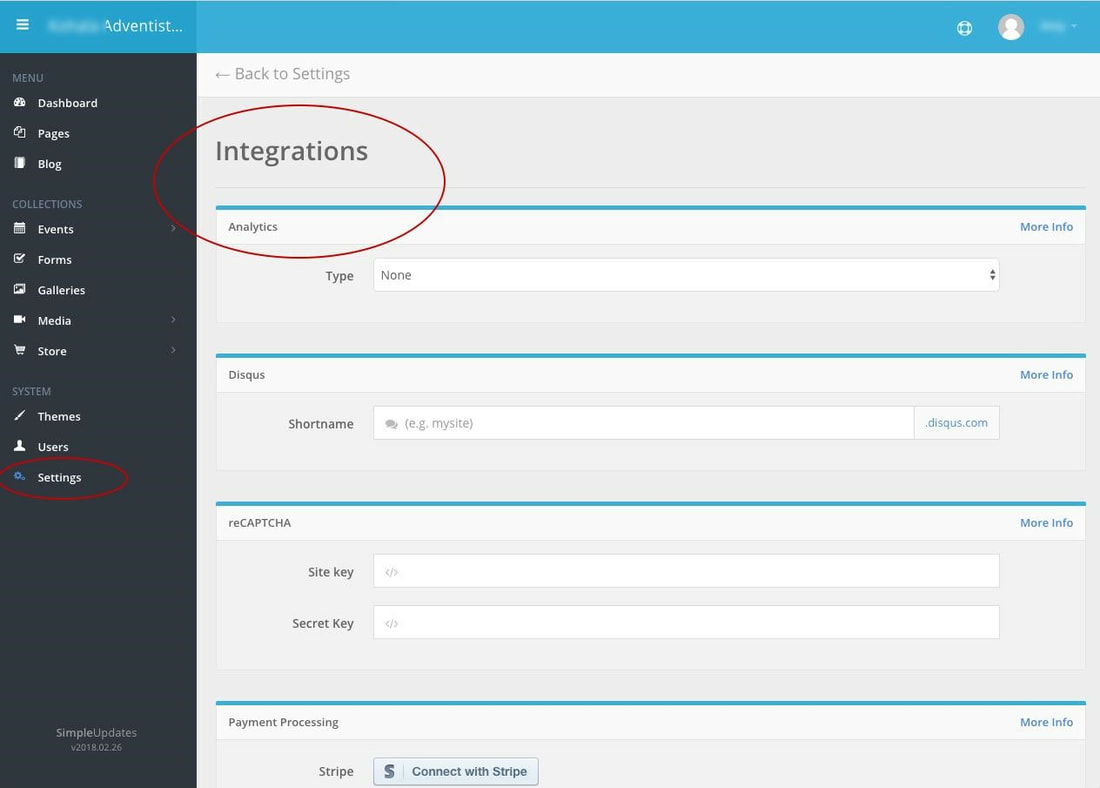
Amy PrindleThe Center for Online Evangelism is a missionary project devoted to developing online mission stations.  Any website worth building is a website worth tracking.NOTE: The following setup describes how to set up Google Analytics and Search Console for a WordPress website, a highly recommended and widely-used development platform (CMS or Content Management System). If your organization’s website is not a WordPress site, what you see will be slightly different, but overall the process tends to be similar. Key differences may arise during steps that involve web development, such as applying tracking codes and uploading verification files. If you have questions, contact your CMS or website provider’s technical support, consult the help section of your platform or reach out to your IT team. Most major platforms will have set instructions for setting up Google Analytics and Search Console. However, it’s a good idea to confirm that your CMS allows the Analytics tracking code to be applied to each page of the website. If not, you miss out on most of the invaluable data of how users navigate your site. Make sure to get a clear answer from the tech support representative. 1. Sign in to your organization’s Gmail account. 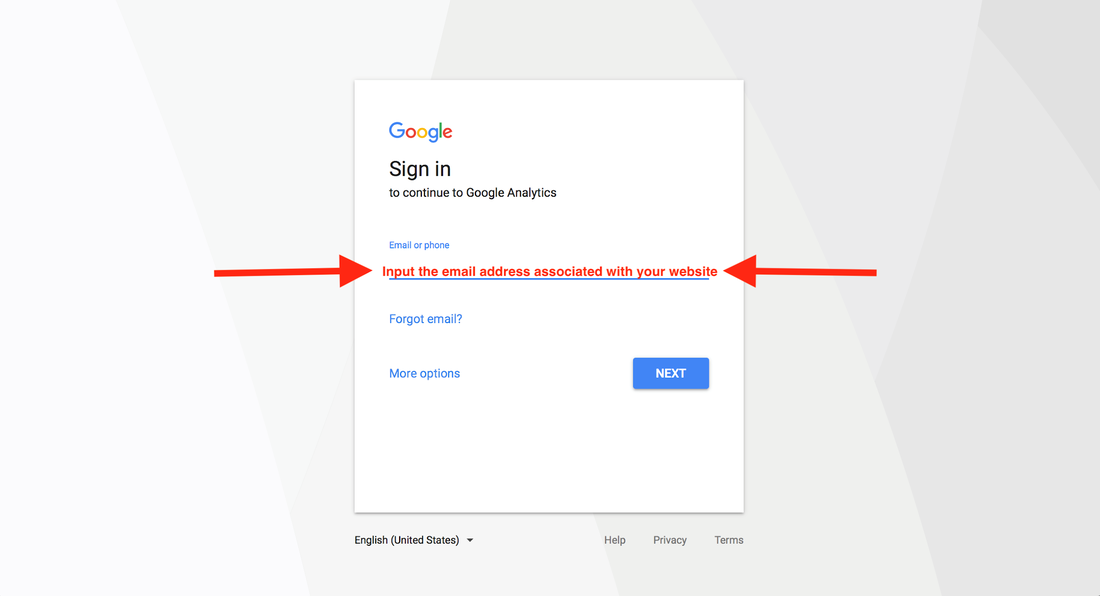 2. After you enter in your email and password, go to analytics.google.com to sign up. 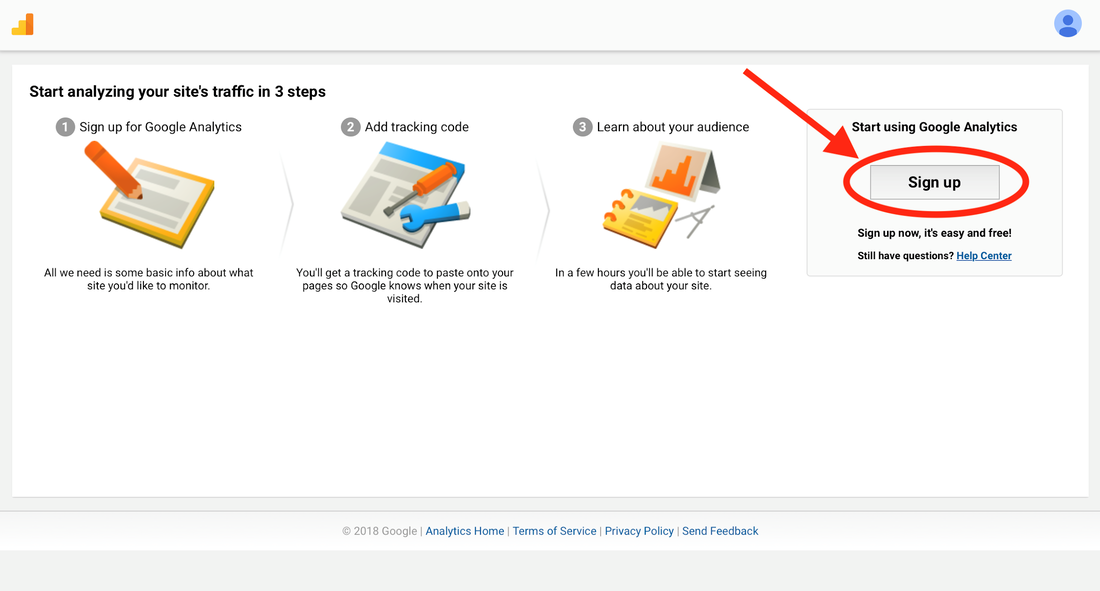 3. Make sure “website” is selected at the top left. 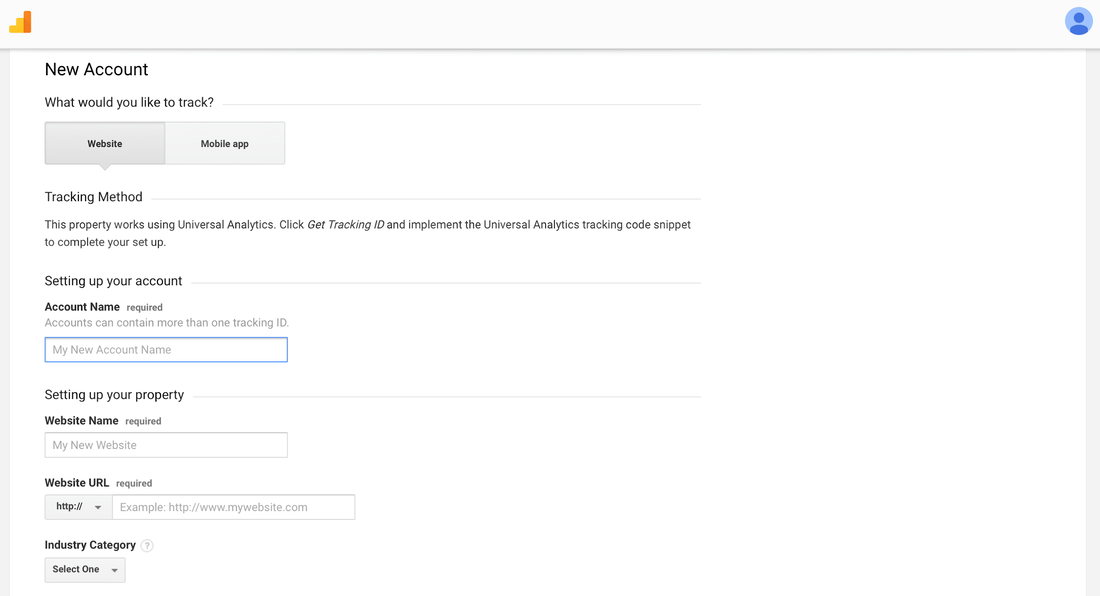 4. Input your organization’s name in “Account Name” 5. Use your website’s domain name for the “Website Name,” e.g., “myministrywebsite.com” 6. “Industry Category” is optional but recommended. This enables Google to show you benchmark data from the websites of similar organizations, giving you a general guide for evaluating website performance and setting expectations. 7. Enter the time zone of your organization’s primary location. 8. Before you finish on this page, note the check boxes. There are some data sharing options. You can read through these links and decide if you’d like to share this information with Google’s support team and account specialists. If you don’t want to share any of your analytics data, leave the boxes unchecked. 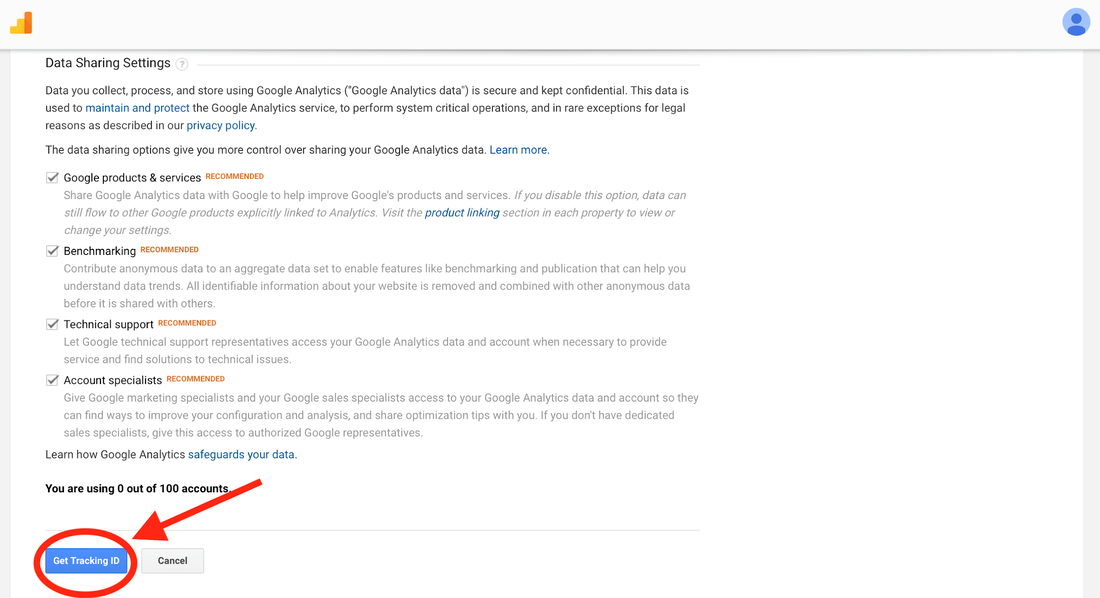 9. Click “Get Tracking ID,” and a pop-up screen will ask you to agree to terms of service. You must accept before you continue. You’ll see a screen similar to this:  10. The Tracking ID and Website Tracking script (code) you receive will need to be installed on each page of your website in order to start gathering information about how people are navigating your site and to, then, present it in its reports. There are several ways to install Google Analytics on your site, and it depends on the type of content management system (CMS) used for your organization’s website. We’ll go through 3 common methods:1. Installing the code in AdventistChurchConnect or AdventistSchoolConnect 3.0
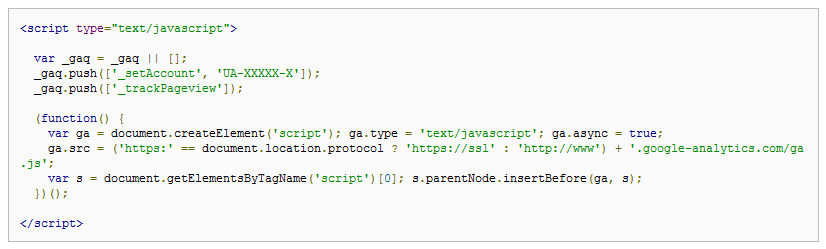
 2) Applying the Website Tracking script to your website’s code.
 3) Using a free WordPress plugin, “MonsterInsites.” (Note: There are several plugins designed for the purpose of applying Google Analytics to your WordPress website, this is just one of the recommended plugins)
Now that your code is applied to your site, check back in a few days to make sure everything is working. You should see some activity through most of your webpages, though it will take about 30 days to truly get a picture of the regular activity. Once you have verified that Analytics is successfully installed, then you can install Google Search Console. This essentially submits your website to Google, enabling you to monitor how your website interacts with search engines. It is also a useful tool to check for errors that might keep Google from crawling your site. Next step blogs: 1/3/2023 06:23:27 am
Excellent article! Thank you for your excellent post, and I look forward to the next one. If you're seeking for discount codes and offers, go to couponplusdeals.com. Comments are closed.
|
Archives
August 2020
Categories
All
|
- Home
- BLOG
-
RESOURCES
-
RESOURCE MENU
>
- ADVENTIST IDENTITY GUIDELINES
- BIG DATA RESOURCES
- BRANDING, IMAGE & DESIGN RESOURCES
- CHURCH/MINISTRY SPECIFIC RESOURCES
- COPYRIGHT & TRADEMARK BASICS
- COURSES
- EMAIL RESOURCES
- GUIDANCE FOR HIRING SOCIAL MEDIA POSITIONS
- PODCASTS
- REPORTS & CASE STUDIES
- SOCIAL MEDIA RESOURCES
- (SOCIAL) VIDEO RESOURCES >
- TEXTING 4 CHURCHES
- TRACKING & ANALTYICS
- WATCH VIDEOS & TUTORIALS
- WEBSITE TIPS
- SOCIAL MEDIA GUIDELINES
-
RESOURCE MENU
>
- SEO
- Digital Discipleship & Evangelism
- COVID-19 RESOURCES
- eNEWSLETTER
 RSS Feed